Showing posts with label For Children. Show all posts

Monday, April 4, 2011

Easter Egg Craft

This project is fairly easy and would be great to do with kids.  Here is what you will need:
~Empty egg carton (paper not plastic or styrofoam)
~Eggs to paint (I found great paper mache ones at Micheals- a pack of 6 for around $2)
~Acrylic paint in your desired colors
~Paint brushes
~Glitter if you want to add a little something extra
~Scissors
~Twig
~Hot glue
~Ribbon

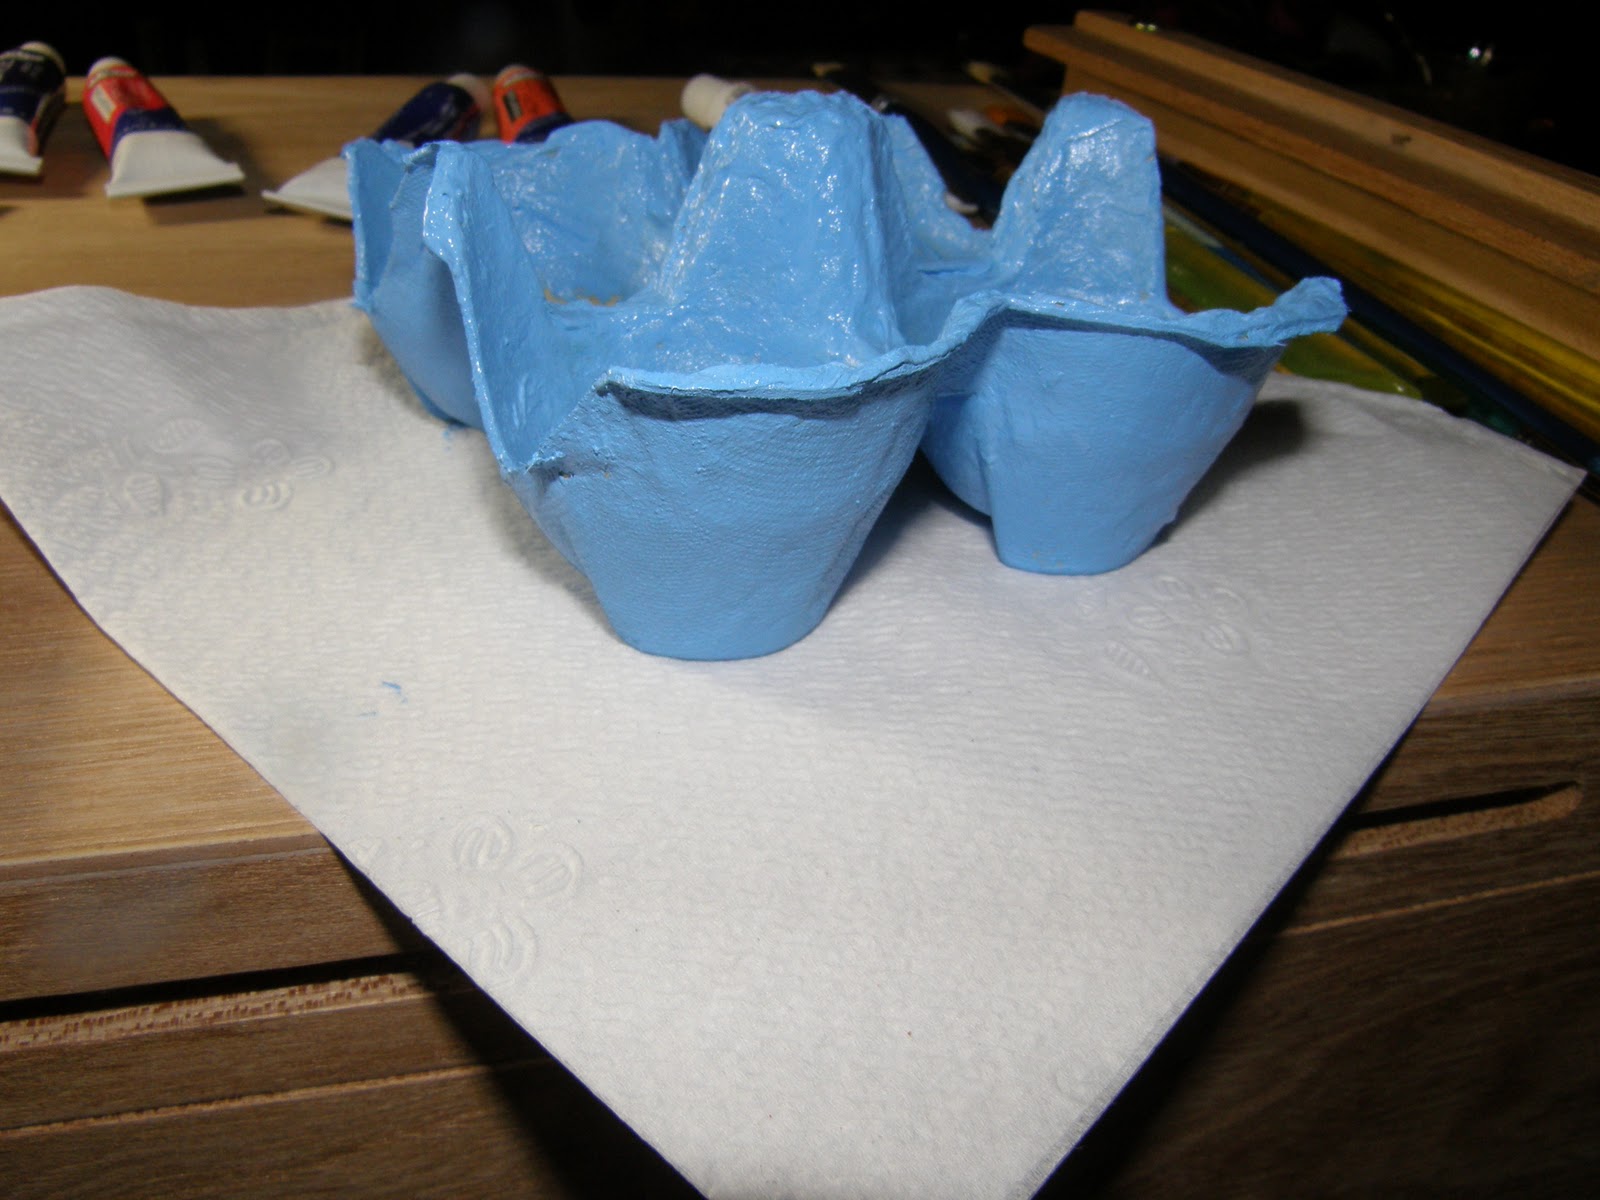
Start by taking your egg carton and cut it into three sections of four egg holders


Next, paint your section of four the color you want, I didn't fully paint the underside and the bottoms of where the eggs sit in since you wont be able to see those spots.


You can now begin painting your eggs.  Paint them flat colors, add stripes, dots, glitter...  whatever you want.
I used my paint pallet to set them on to dry but you could place them in your egg carton but set them in lightly so you don't mess the paint. 


Once everything is dry take your glue gun and add some hot glue to the inside of each egg holder so that the eggs will stay in place.

You will then poke two small holes at each side of your egg carrier, one at each side.  This is for the twig to go through, use a twig that is bendable otherwise it will break when you shape it.  You may want to use a knife to shave the ends of your twigs down a bit so that the go into the holes better.  Obviously an adult should do this part.


Next put your twig ends through each hole and use your hot glue to glue the twig on the underside of the carton.


You can now add your bow, tie it on however you want and your done!


Friday, April 1, 2011

Cake Balls/Pops!

Am I behind on posting or what!  It has been a crazy week.  This is a project I did last week and thought you guys would enjoy this, it's a great one to do with kids too.


Here is everything you will need...
~Cake mix and whatever ingredients it calls for
~Frosting
~Chocolate (I used chocolate chips because it's what I had at home but I would strongly suggest using baking chocolate since it makes for better presentation)  Get creative with this, use pink, purple or whatever color you want.  Michaels and most other craft stores will sell pre-colored baking chocolate. 
~Sprinkles or whatever you want to use to decorate
~Wax paper
~Bowls for mixing
~Spoon
~Baking sheet

Start by baking the cake and letting it cool, then cut around the edges so that you do not have any hardened pieces in your mix.  Cut the remainder of the cake into small squares, this makes it easier to work with.


Place your cake squares into a bowl and use your hands to break them up into a fine mix (obviously make sure your hands are clean for this).  Then take about 5 tablespoons of your frosting and add it to the cake. 

Use your hands again to knead the frosting into the cake mix, much like when making meatballs.  The mixture should work up into a mix that you can work with and mold into balls.  If you need to add more frosting go right ahead.


Lay out your baking sheet and put wax paper over it.  take small mounts of your cake mix and make it into little bite size balls and place them on your baking sheet.  I then place my sheet with the cake balls on it in my freezer for about 30 minutes, they are much easier to cover with chocolate like this since they will be harder.


Once your cake balls are almost ready to pull out of the freezer you can begin melting your chocolate.  You can use either the double pot method or a microwave but you have to be very careful with a microwave.  If using one, heat in 30 second intervals and stir often to get the right consistency.  If you over heat, the chocolate will actually harden up again.  If you are using baking chocolate just follow the directions on the package.  Take your balls one at a time and dip them in your chocolate, a serving spoon will be a big help here.  Once it is covered place it back on your wax paper covered baking sheet and decorate with sprinkles if you like.


Wait for the chocolate to harden, eat and enjoy!  Mine obviously aren't as pretty as they could be because I used chocolate chips but they were still yummy!


You can also make these into Cake Pops simply by inserting lollipop/sucker sticks into the balls before freezing them.  This also makes it easier when dipping them into chocolate.  You can also use a block of foam to put the ends of the sticks into and stand them up so that they dry better without a flat end on them from resting on the wax paper to harden.  Both the sticks and foam can be purchased at your local craft store.

Sunday, March 27, 2011

Homemade Hair Bows

I had to wait to post this one considering I made these for my girlfriend as part of her baby shower gift and her shower was just yesterday.  These are very easy and you can get as creative as you want- add beads, buttons, crystals, etc. 


Here is what you will need...  Hair clips- I purchased box of 80 clips for around $6 from Sally Beauty Supply.  Ribbon- I purchased mine from Michaels and they ranged from $1-$3 a spool.  You will also need a glue gun, lighter, thread and needle for this project. 


Start with using your glue gun to attach ribbon to your clips so that there are no sharp ends.  You should use a lighter to singe the ends of your ribbon so that they do not fray.  To do this just hold the lighter to the end of the ribbon but to not touch the ribbon with the flame, you want to hold it close enough so that it melts.  Obviously an adult should do this portion of the project if you are working with children for this project.  You should always be careful when working with fire and flammable products.


Next you will start to make the bows you want to use.  You should also take a lighter to singe the ends of your ribbon on this step as well.  I do not cut the length of ribbon until I make the shape of the bow and see exactly how much I will need.  Once you have the bow shaped you should take your needle and thread and put it through the middle of the bow, wrap it around the entire middle of the bow loosely once or twice and then while holding the middle of the bow between your fingers pull the thread tightly- this will ensure that the bow pinches the way you want it to and that the ribbon does not turn in a direction that you do not want.  Wrap the thread around a few more times and then tie it off. 


You can now get creative at this step.  If you want to add a knot at the middle to hide the thread just take a small piece of ribbon, knot it and glue the ends of the ribbon to the back of your bow.  You can also add beads or buttons if you want, whatever you like would work.  Once your bow is complete you will put hot glue to the top of your clip and attach it to the back of your bow. 


Get creative, make different types and sizes of bows.  I made quite a few and I thought I took pictures of all of them but they are not showing up on my camera.  Oh well, have fun with this easy project :)